
We may earn commissions when you shop through the links below at no additional cost to you.
To set up and secure a DigitalOcean Droplet on Ubuntu 24.04, provision an instance via the cloud console, establish an SSH key connection, disable remote root login, configure an unprivileged sudo user, and enforce network boundary filtering using UFW and Fail2ban.
Why Choose DigitalOcean for Hosting & Security Labs?
Unlike traditional hyperscalers (AWS or GCP) that charge unpredictable fees for basic static IPs and bandwidth overages, DigitalOcean provides flat-rate compute instances (Droplets) with high-speed NVMe storage and predictable networking.
| Metric / Feature | AWS EC2 (t3.micro/small) | DigitalOcean Droplets |
| Pricing Predictability | Variable (Bandwidth/Egress fees) | Flat-rate monthly billing ($4–$6/mo) |
| Firewall Setup | Complex Security Group rules | Free upstream Cloud Firewalls |
| New User Incentive | Highly restricted tier | $200 Free Trial Credit (60 Days) |
| Deployment Time | 3–5 minutes | Under 60 seconds |
Step 1: Provisioning an Ubuntu 24.04 Droplet ($200 Credit)
Before provisioning your server, claim the developer promotional grant to spin up high-performance compute instances at zero upfront cost:
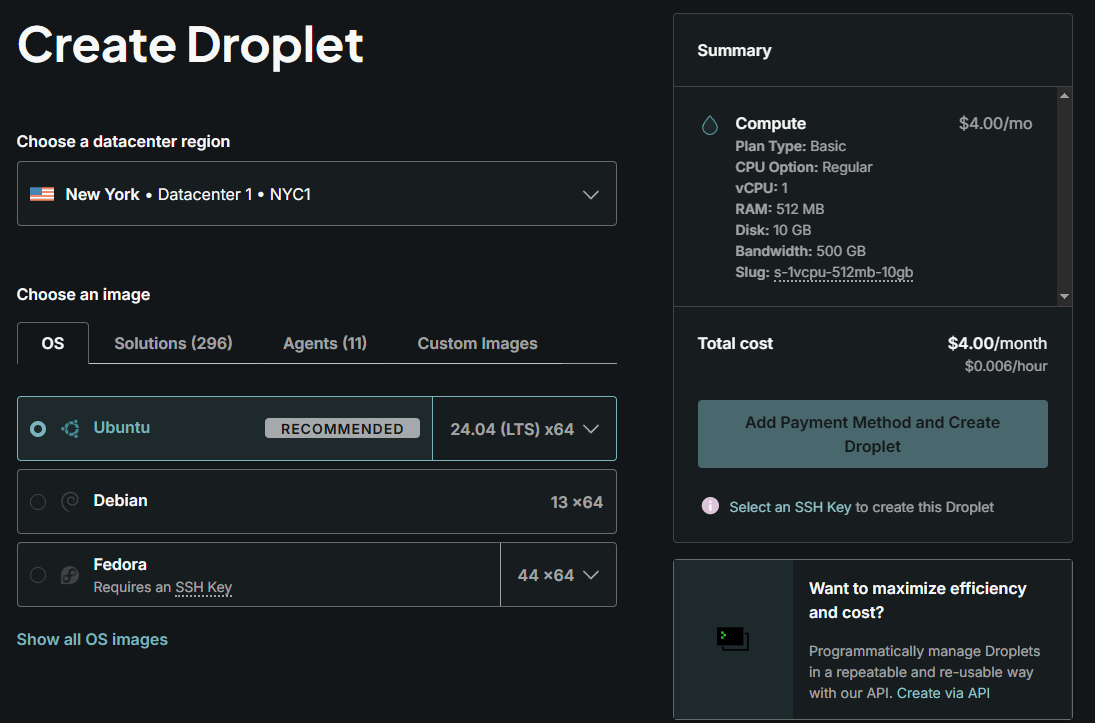
Sign up through the link above and navigate to Create > Droplets.
Distribution: Select Ubuntu 24.04 LTS (x64).
Droplet Type: Choose Basic with Regular or Premium NVMe SSD.
Data Center: Select the region closest to your target audience (e.g., Frankfurt for EU/MENA, New York for US).
Authentication: Choose SSH Key (recommended) to prevent password brute-forcing.
Step 2: Non-Root User & Key-Based Authentication
Operating directly under the root account exposes the host to accidental destructive commands and privilege abuse.
Connect to your Droplet via terminal and establish an isolated administrative user:
Transfer your local public key to the new user's authorized key directory:
Step 3: Hardening SSH Daemon Configuration
Automated bots continuously probe public IPv4 subnets for exposed port 22 credentials. Lock down the OpenSSH daemon configuration:
Step 4: Network Boundary Defense with UFW
Enforce default-deny inbound policies using Uncomplicated Firewall (UFW) to drop unauthorized port sweeps at the kernel level:
Verify active listening boundaries:
Step 5: Automated Intrusion Prevention with Fail2ban
Install Fail2ban to automatically block IP addresses exhibiting malicious behavioral patterns, such as repetitive SSH authentication failures:
Verify that the service is running and inspecting authentication logs:Performance & Network Verification
Testing network stability via 100-packet ICMP probes to tier-1 transit backbones confirms low-latency connectivity without packet loss or hypervisor jitter:
❓ Frequently Asked Questions (FAQ)
How do I apply the $200 free credit to my account?
Sign up via the official partner link and link a valid payment method (credit card or PayPal) to verify your identity. The $200 promotional balance applies immediately for 60 days.
Can I run Docker containers on entry-level Droplets?
Yes. Basic 1 vCPU / 2GB RAM Droplets efficiently run multiple isolated Docker containers using Docker Compose behind reverse proxies like Traefik or Nginx.
Are static IPv4 addresses included with basic Droplets?
Yes. Every standard Droplet comes with a dedicated public IPv4 address and high outbound bandwidth allowances included in the flat monthly rate.
🚀 Next Steps & Maintenance
With SSH key authentication enforced, UFW active, and Fail2ban monitoring intrusion vectors, your droplet is ready for production workloads. To complete your setup, proceed with installing your web server (Nginx/Apache), provisioning free SSL certificates via Certbot, and enabling automated daily backups.
💡 Ready to build? Spin up your hardened Ubuntu instance today with DigitalOcean's $200 Developer Credit Grant (Valid for 60 days on new accounts).